OASIS SKIN & WELLNESS CENTER INC
  • Home
  • Services
    • Oasis Membership
    • Oasis Skin Analysis and Consultation
    • Age Management Facials
    • Procell MicroChanneling
    • Skin Classic
    • Massage
    • Ultimate Oasis Body Molding Service
    • CyroSkin 3.0 Body Treatments >
      • CyroSkin Results Page
    • BioSlimming Body Wrap
    • Solo Spa Sauna
    • Relaxation Station
    • Hair Removal Wax Services
    • Lash & Brow Enhancements
    • Classes
    • Recommended Providers
  • Products
    • Oasis Facial in a Bag
    • Other Recommended Products
  • Gift Cards
  • About Us
    • Employment
    • Cancellation Policy
    • Forms
    • FAQ
    • Reviews
    • Powerful and Pampered
  • Blog
    • Video Library
  • Payment Plans
  • Book Now

10/2/2015

Fastest Home Manicure & Pedicure Ever

0 Comments

Read Now
 
Picture

​If you are like me, you don't really have time to sit at the nail salon every two weeks and get a great mani and pedi. And if you are like me, as much as you want to say you have time to soak your toe-toes and do a great home pedi each month, it actually occurs about every two months. What's a gal to do? I refuse to have crusty dry toes with chipped polish.  I have developed and process & product system that is  fast, SUPER Cute, easy and will last at least 10 days on your hands and 14 or longer on your toes. 

Create the Perfect Manicure at Home in 20 Minutes or Less
Picture
Shop SallyBeauty.com!
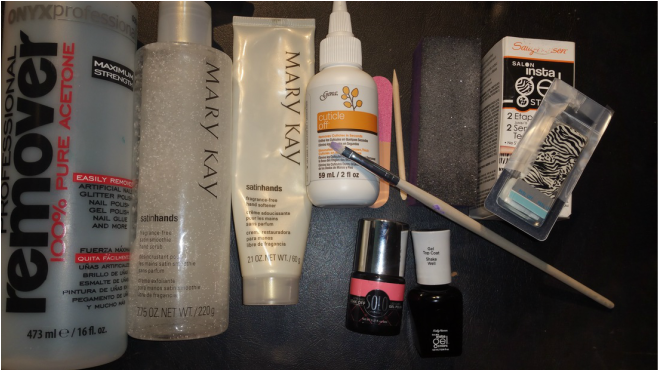
Most of the Tools you will need can be purchased at Sally Beauty Supply for very affordable prices. 
  1. Gena Cuticle Remover 
  2. Your Favorite Color of SOLO One Step
  3. Your favorite  Sally Hansen Salon Effect Real Nail Polish Strips & Sally Hansen Gel Top Coat
  4. Hand or  Foot Scrub - Mary Kay Satin Hands set
  5. Nail file, Nail shine buffer, cuticle pusher, and Acetone LED Lamp
Picture
Before I did into the set by step. I just want to chat a bit about the products I use. 

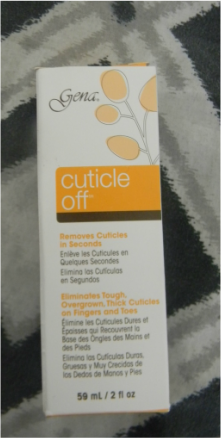
1) The Cuticle remover by Gena  is amazing. It is less than 5.00 and lasts for months. I use it to keep fingers and toes cuticle moisturized and controlled between manicures & pedicures.  It is WAAAYY faster than soaking and it very effective and softening the cuticle, so much so that it is easily removed for the nail.  Other people use conditioner, however, if you cuticles grow like mine on my toes, that will not do the trick. 

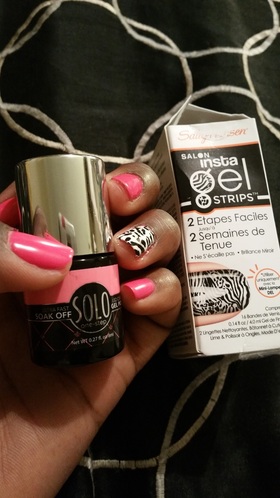
2) I adore the SOLO One Step gel nail polishes. I have yet to find a gel polish that matches its durability and its application speed. The color selection is great and it is so affordable. 


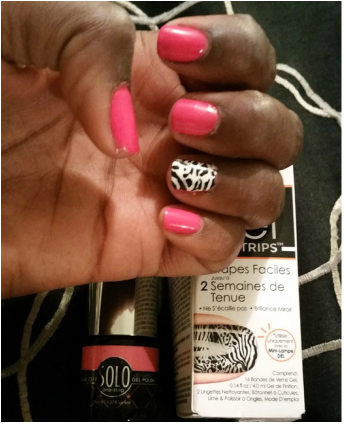
3) The Sally Hansen Salon Effects Real Nail Polish strips are great. They come in fun designs and are super easy to apply. They allow a good gel polish to become a great fashion fancy gel polish application. Also grab any bottle to Gel top Coat. I use the Sally Hansen 

4)As far as a Foot Scrub or Hand Scrub, I use the Mary Kay Satin Hand Set to make sure my hands and feet are  quickly exfoliated and hydrated. You can use your favorite foot or hand scrub, or even make your own. Just be sure to apply a moisturizer afterwards. 

5) Tools: You will need a nail file, a nail buffer with a small amount of grit, and a cuticle pusher. Any LED Gel polish lamp will work, however I use the Sensationail LED Lamp.  I have linked to appropriate tools for beginners.  

Step 1 : Prep Cuticles &  File & Buff nails 

  1.  Apply a small amount to of the cuticle remover to your cuticle. 
  2. Let it sit for 30 or so, longer if your have rough toes. 
  3. Using the cuticle pusher, softly push back the cuticle and work the tool and solution all from one side of the nail to the other side. massage the solution all over the nail.
  4. Buff the top of the nail to remove any shine and to create a naked surface. 
  5. Use the nail to shape the nail and to correct any unevenness. 

Step 4: Apply your Design

Pro Tip: Have scotch tape handy, the Sally Hansen Strips come in sets of 20, however, if you are like me you only want to use one to two strips at a time to ascent your polish color. The scotch tap will allow you to reseal the remaining strips for later use. 
  1. Remove an appropriate sized strip (see pro tip above to preserve any unused strips).
  2. Place the edge of the strip as close to the cuticle as possible, but do no let it touch. It is sticky so take your time and get it on there correctly the first time. 
  3. Using your cuticle pusher, bend and shape the strip to the corners of your nail. Use your file in a downward motion to remove any excess of the strip.
  4. Use the Sally Hansen GELTop Coat (you can also use the  that came with the strips to seal them. You can also apply this top coat to all your nails for added shine
  5. Cure for atleast 30 seconds
  6. Remove any sticky residue (there shouldn't be much) with a cotton ball and a small amount of acetone.

Step 2: Scrub Hands or Feet 

  1.  Apply your favorite hand or foot scrub.Rub it in to the skin and cuticles for at least 3 to 5 minutes. 
  2. Rinse it away under warm water. 
  3. Apply any lotion or cream, avoid directly getting this on the nail bed.
  4. Using a cotton ball and acetone, remove any moisture from the nailbed.

Step 3: Paint & Cure

Pro Tip: Have a cap full of acetone and a small short bristled brush close at hand to clean up any messy edges. 
  1. Apply 1 coat of the SOLO One Step Gel Nail Polish
  2. Cure in the LED Lamp for 30 secs to 1 minutes (repeat this steps, be sure to clean up the edges before curing)
Picture
Please let me see the designs and colors you come up with. Use the hashtag #LadyDay
Let me know how long the process takes for you. I can usually get my toes & nail done in 30 minutes or less. And please let me know what you think of the products. 

Share

0 Comments


Leave a Reply.

Details
    Picture

    Lilly Cook 

    I am an esthetician, wife & mom that has a love affair with Skincare & Cosmetics.

     This blog is a way for me to stay focused, accountable and hopefully inspire others to take control of their skin care journey as well as education and communicate events and products that are coming up soon. 

     I am the self proclaimed Queen of Typos! Sorry in advance for my "different writing style", enjoy! 

    Oasis Skin Care Clinic is a client focused skin therapy center that pairs clinically proven skin care treatments and techniques with a relaxing spa environment.

    Archives

    October 2015
    July 2015
    May 2015
    April 2015

    Categories

    All
    Nail Enhancements
    Nail Polish

    RSS Feed

Contact Information
Oasis Skin & Wellness Clinic Inc.
707 Walnut St
Murphysboro, IL 62966

info@oasisskincareclinic.net
Call or Text  (618) 207 - 4404
Website Disclaimer
Join the Community      
  • FACEBOOK
  • TWITTER​
  • ​INSTAGRAM
Picture
Subscribe Today
Subscribe to our Leading Lady Newsletter today and receive exclusive offers and updates on "The Oasis Happenings" and helpful tips to improve your skin.
    Press Submit Below *
Submit
  • Home
  • Services
    • Oasis Membership
    • Oasis Skin Analysis and Consultation
    • Age Management Facials
    • Procell MicroChanneling
    • Skin Classic
    • Massage
    • Ultimate Oasis Body Molding Service
    • CyroSkin 3.0 Body Treatments >
      • CyroSkin Results Page
    • BioSlimming Body Wrap
    • Solo Spa Sauna
    • Relaxation Station
    • Hair Removal Wax Services
    • Lash & Brow Enhancements
    • Classes
    • Recommended Providers
  • Products
    • Oasis Facial in a Bag
    • Other Recommended Products
  • Gift Cards
  • About Us
    • Employment
    • Cancellation Policy
    • Forms
    • FAQ
    • Reviews
    • Powerful and Pampered
  • Blog
    • Video Library
  • Payment Plans
  • Book Now