

If you are like me, you don’t really have time to sit at the nail salon every two weeks and get a great mani and pedi. And if you are like me, as much as you want to say you have time to soak your toe-toes and do a great home pedi each month, it actually occurs about every two months. What’s a gal to do? I refuse to have crusty dry toes with chipped polish. I have developed and process & product system that is fast, SUPER Cute, easy and will last at least 10 days on your hands and 14 or longer on your toes.
Create the Perfect Manicure at Home in 20 Minutes or Less
 |
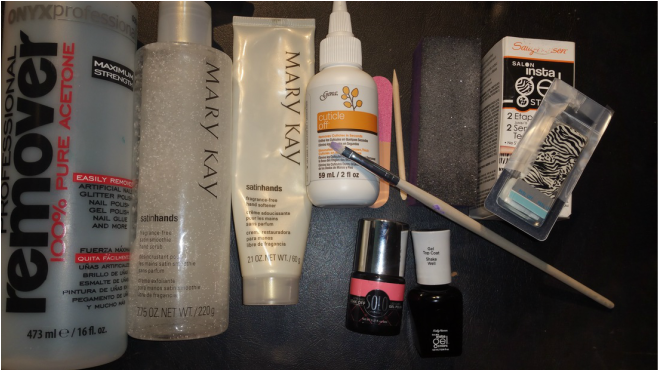
Most of the Tools you will need can be purchased at Sally Beauty Supply for very affordable prices. |
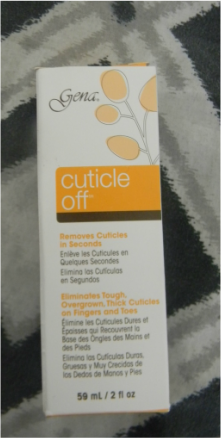
- Gena Cuticle Remover
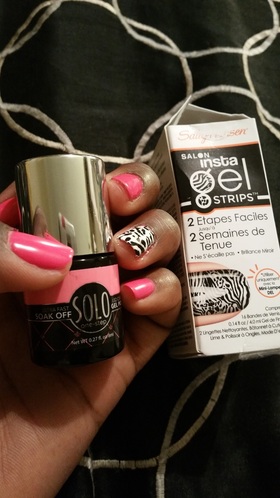
- Your Favorite Color of SOLO One Step
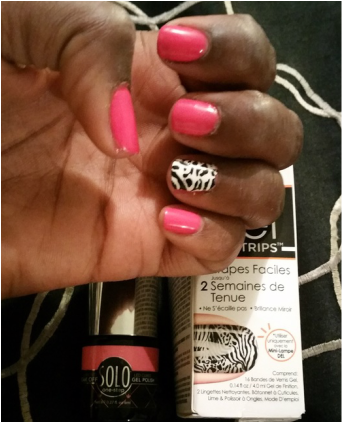
- Your favorite Sally Hansen Salon Effect Real Nail Polish Strips & Sally Hansen Gel Top Coat
- Hand or Foot Scrub – Mary Kay Satin Hands set
- Nail file, Nail shine buffer, cuticle pusher, and Acetone LED Lamp
Before I did into the set by step. I just want to chat a bit about the products I use.
1) The Cuticle remover by Gena is amazing. It is less than 5.00 and lasts for months. I use it to keep fingers and toes cuticle moisturized and controlled between manicures & pedicures. It is WAAAYY faster than soaking and it very effective and softening the cuticle, so much so that it is easily removed for the nail. Other people use conditioner, however, if you cuticles grow like mine on my toes, that will not do the trick.
2) I adore the SOLO One Step gel nail polishes. I have yet to find a gel polish that matches its durability and its application speed. The color selection is great and it is so affordable.
3) The Sally Hansen Salon Effects Real Nail Polish strips are great. They come in fun designs and are super easy to apply. They allow a good gel polish to become a great fashion fancy gel polish application. Also grab any bottle to Gel top Coat. I use the Sally Hansen
4)As far as a Foot Scrub or Hand Scrub, I use the Mary Kay Satin Hand Set to make sure my hands and feet are quickly exfoliated and hydrated. You can use your favorite foot or hand scrub, or even make your own. Just be sure to apply a moisturizer afterwards.
5) Tools: You will need a nail file, a nail buffer with a small amount of grit, and a cuticle pusher. Any LED Gel polish lamp will work, however I use the Sensationail LED Lamp. I have linked to appropriate tools for beginners.
Step 1 : Prep Cuticles & File & Buff nails
Step 4: Apply your DesignPro Tip: Have scotch tape handy, the Sally Hansen Strips come in sets of 20, however, if you are like me you only want to use one to two strips at a time to ascent your polish color. The scotch tap will allow you to reseal the remaining strips for later use.
|
Step 2: Scrub Hands or Feet
Step 3: Paint & CurePro Tip: Have a cap full of acetone and a small short bristled brush close at hand to clean up any messy edges.
|
Please let me see the designs and colors you come up with. Use the hashtag #LadyDay
Let me know how long the process takes for you. I can usually get my toes & nail done in 30 minutes or less. And please let me know what you think of the products.